|
FREE Art templates and dimensions for CD/DVD/USB Flash packaging artwork, disc, and usb logo image: |
Artwork Templates with Image Dimensions for CD/DVD disc, USB Logo, and Package Artwork:
- All of our printing is single sided only. This is sometimes referred to as 4/0 printing (scroll down for more info).
- CD/DVD artwork examples.
- USB artwork examples.
- Your artwork should be a .bmp file or a .jpg file saved as RGB. For USB logo images, we accept .png or .jpg images. If you use .jpg, save using the highest quality, lowest compression (largest file size -- see bottom of this page).
- The artwork graphics you provide (.jpg or .bmp images) will be stretched to fit if your artwork is of a different size. For best results, make sure to use the dimensions listed below to maintain the proper aspect ratio. Use the templates below to get the size and dimension of each type of graphic artwork file. For the best looking output, you would want to have an image with the same aspect ratio (proportional dimensions).
- Our production system prints the disc, DVD case overwrap, CD case inserts and all graphics using RGB 300 dpi full color or better.
- For the image printed directly to the CD/DVD, the outer 1mm or so will not be printed (cropped off). Keep important text away from the outer edge and inner hub area.
- For USB LOGO images, we print it the exact size so normally, the entire image is used.
- For DVD or CD case artwork, we print the image slightly larger (about 2mm on each edge) than the final published size shown on each template. We trim off the outer 2mm or so on each edge.
- You should have no cut marks on your artwork.
- You should not have white space on the outer edges of your images.
- Make sure important parts of your artwork are away from the edge as much as possible.
- Avoid different colors or borders near the edges of your artwork. Since it's likely the cut will be slightly off center, any borders or white space at the outer edges of your image will make any variances in centering more obvious. The outside edges of your artwork should be a simple, smooth extension of your background. In other words, just extend out your background color or background image to the edge.
- After you've uploaded your .jpg or .bmp artwork, you may see what your product will look like. Login to TrepStar, then click the 'view product' choice listed in the dropdown menu near the order button (next to each of your products). This feature gives you an approximation of how your images will be printed and will show you if you have it pretty close to what you expect.
- Your computer monitor has much less resolution than what is printed at 300 DPI (dots per inch). For example, a 1920 pixel wide screen is only 6.4" at printed size 300dpi. You should try printing your final artwork image from your computer to see how it looks printed. When looking at your image properties, or sometimes when looking at image re-size options, make sure your image is the correct size and at 300dpi. Then, select print preview from your graphics program and set it to print at 100% scale. If you have the image set up properly, it will print exactly the same size is how it will print on our system. Then imagine we trim the outer edges of the image about 1.5 mm on each edge.
- Avoid placing critical text or graphics within 5mm of the edges of your artwork. We do not trim very much of your image during production, but there is some trim area (about 1.5mm).
- Try to use light coverage artwork to avoid dark ink coverage print fees.
Do you need help creating your artwork? Try one of these options:
- Canva.com Create free Artwork yourself.
- Send an email to help@trepstar.com and TrepStar can add your artwork to our templates for $59.
- Send an email to help@trepstar.com and TrepStar can design your artwork for $129.
We use what's commonly called 4/0 printing.
- The "4" in 4/0 means digital printing which uses four colors (Cyan, Magenta, Yellow, and Black) to make up every color variation. The "0" means no printing on the back.
- 4/0 means printing 4-color process on 1 side and blank on the other side. This is what TrepStar uses.
- 4/1 means printing 4-color process on 1 side and black/white on the other side. We do not use this method.
- 4/4 means printing 4-color process on both sides. We do not use this method.
USB Flash Drive Logo Image
The small logo image is printed to a clear label, then applied to BOTH sides of the USB Flash Drive.
- USB artwork examples.
- Try to limit the complexity of your logo image. Avoid lots of small text.
- The same image is printed to both sides of the USB
- The logo image is printed at the exact size of the template with no trimming.
- Anything white is transparent. The color of the USB Flash Drive will show through the clear label. Currently, we use a white USB Drive.
- For the USB Logo image, we accept .PNG or .JPG images. If .PNG, set opacity and transparency where white should be transparent.
- Our system will stretch your image to the correct size when printing, but try to start out with a 450x150 pixel image.
- Our optional USB packaging choices include a 2 panel folded image that is exact same size as our jewel case sized 2 panel image template shown below. Use that larger 2 panel artwork for specific product information. The logo image printed on the small flash drive should be very simple with minimal text.
- Here is a link to a logo image template. View
- Download this file by right clicking on it and choosing save as... Then using Paint, Paint Shop Pro, PhotoShop, or any other graphics editor, add your artwork to this template.
- Save as RGB not CMYK
- If you need help, we suggest you try Canva.com to create free artwork. Watch Video: Create Free artwork on Canva:

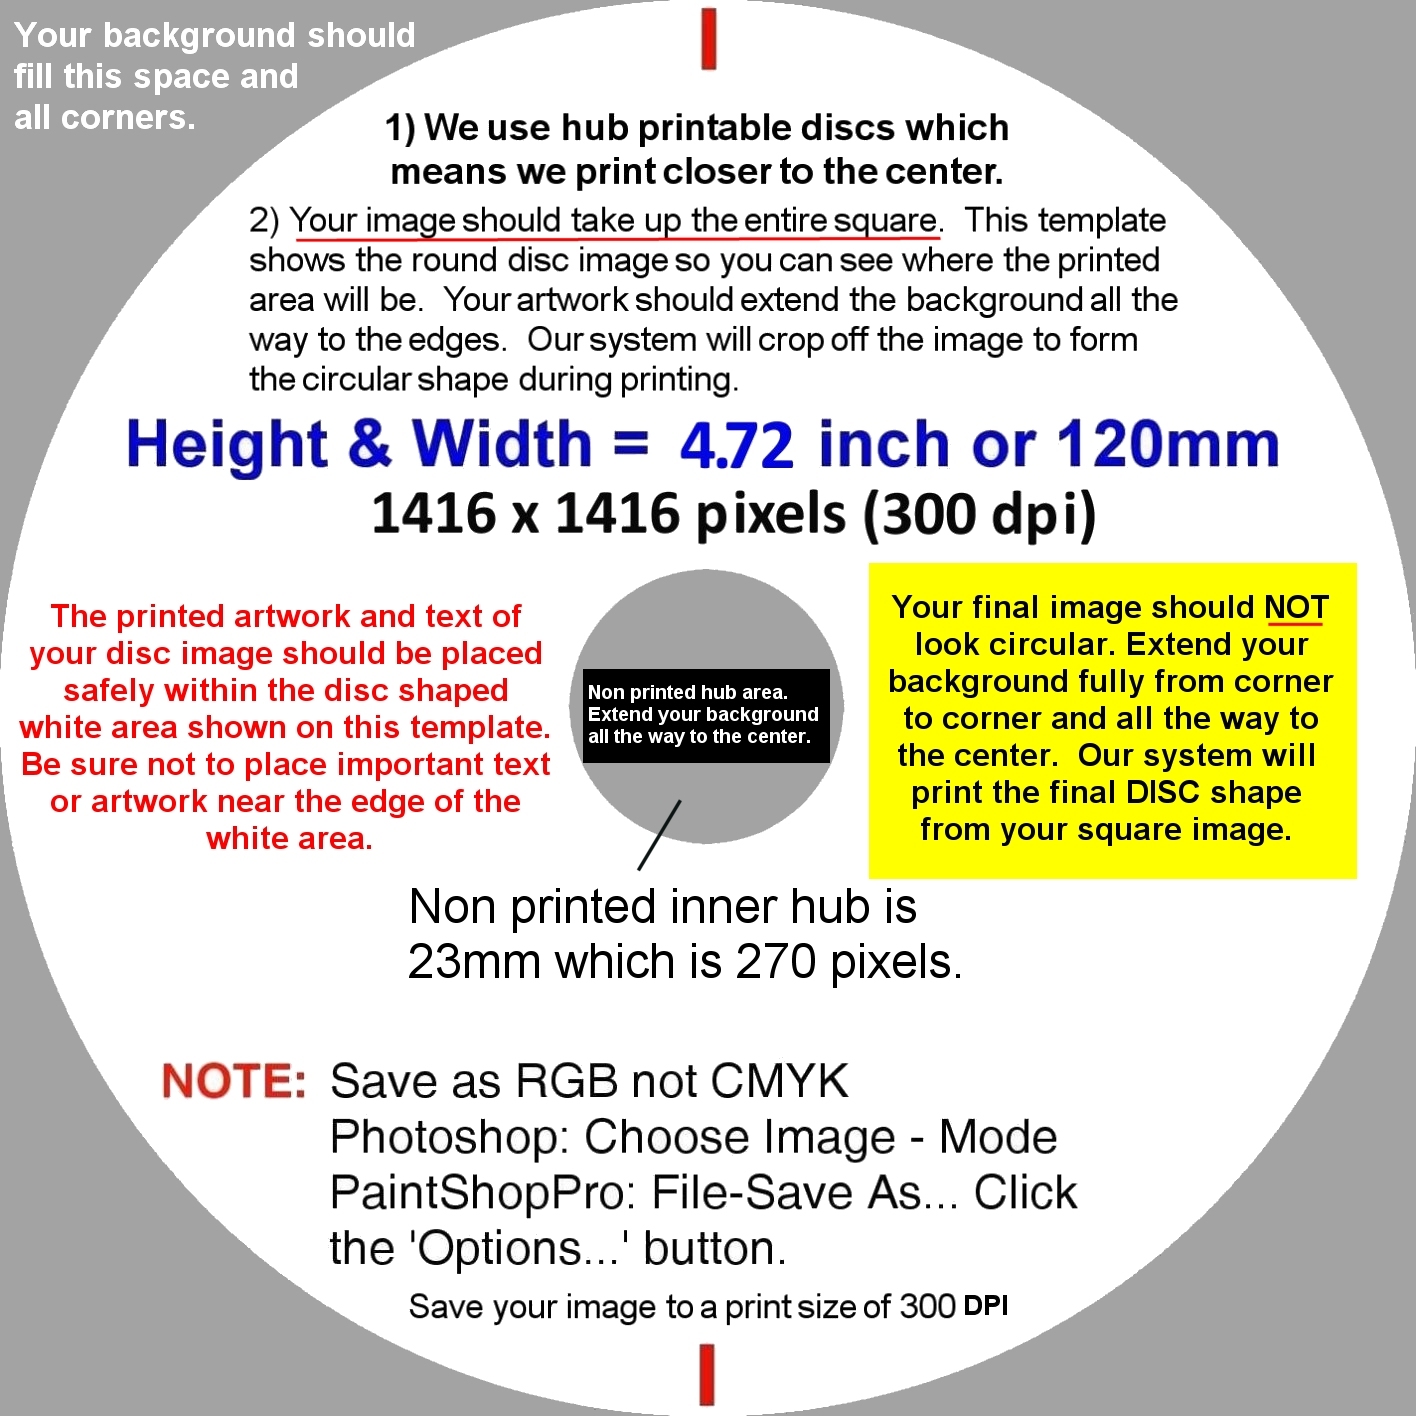
CD or DVD Disc Image.
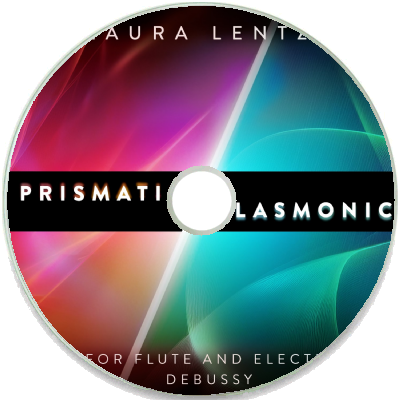
The disc image is printed directly to the CD or DVD surface. Image should be be square (1x1 aspect ratio height=width). The dimensions are listed below.
- Click Here for Detailed Instructions
- Do not mask off a circular disc image.
- The template shows you a disc image circle so you can know roughly where your artwork will be cut off.
- Your image should be square with artwork from edge to edge including the center hub.
- Any high resolution square .bmp or .jpg image will do (height = width).
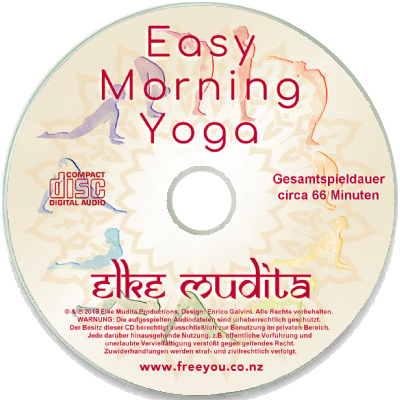
- Our system will cut off (crop) any part of the image that does not fit on the disc shape. Click Here to see examples.
- Here is a link to a disc image template. View
- The outer 1mm (or so) of the disc image will not be printed (cropped off). Make sure nothing too important (text etc) is near the edges or the inner hub.
- Download this file by right clicking on it and choosing save as... Then using Paint, Paint Shop Pro, PhotoShop, or any other graphics editor, add your artwork to this template.
- Save as RGB not CMYK
- If you need help, we suggest you try Canva.com to create free artwork. Watch Video: Create Free artwork on Canva:
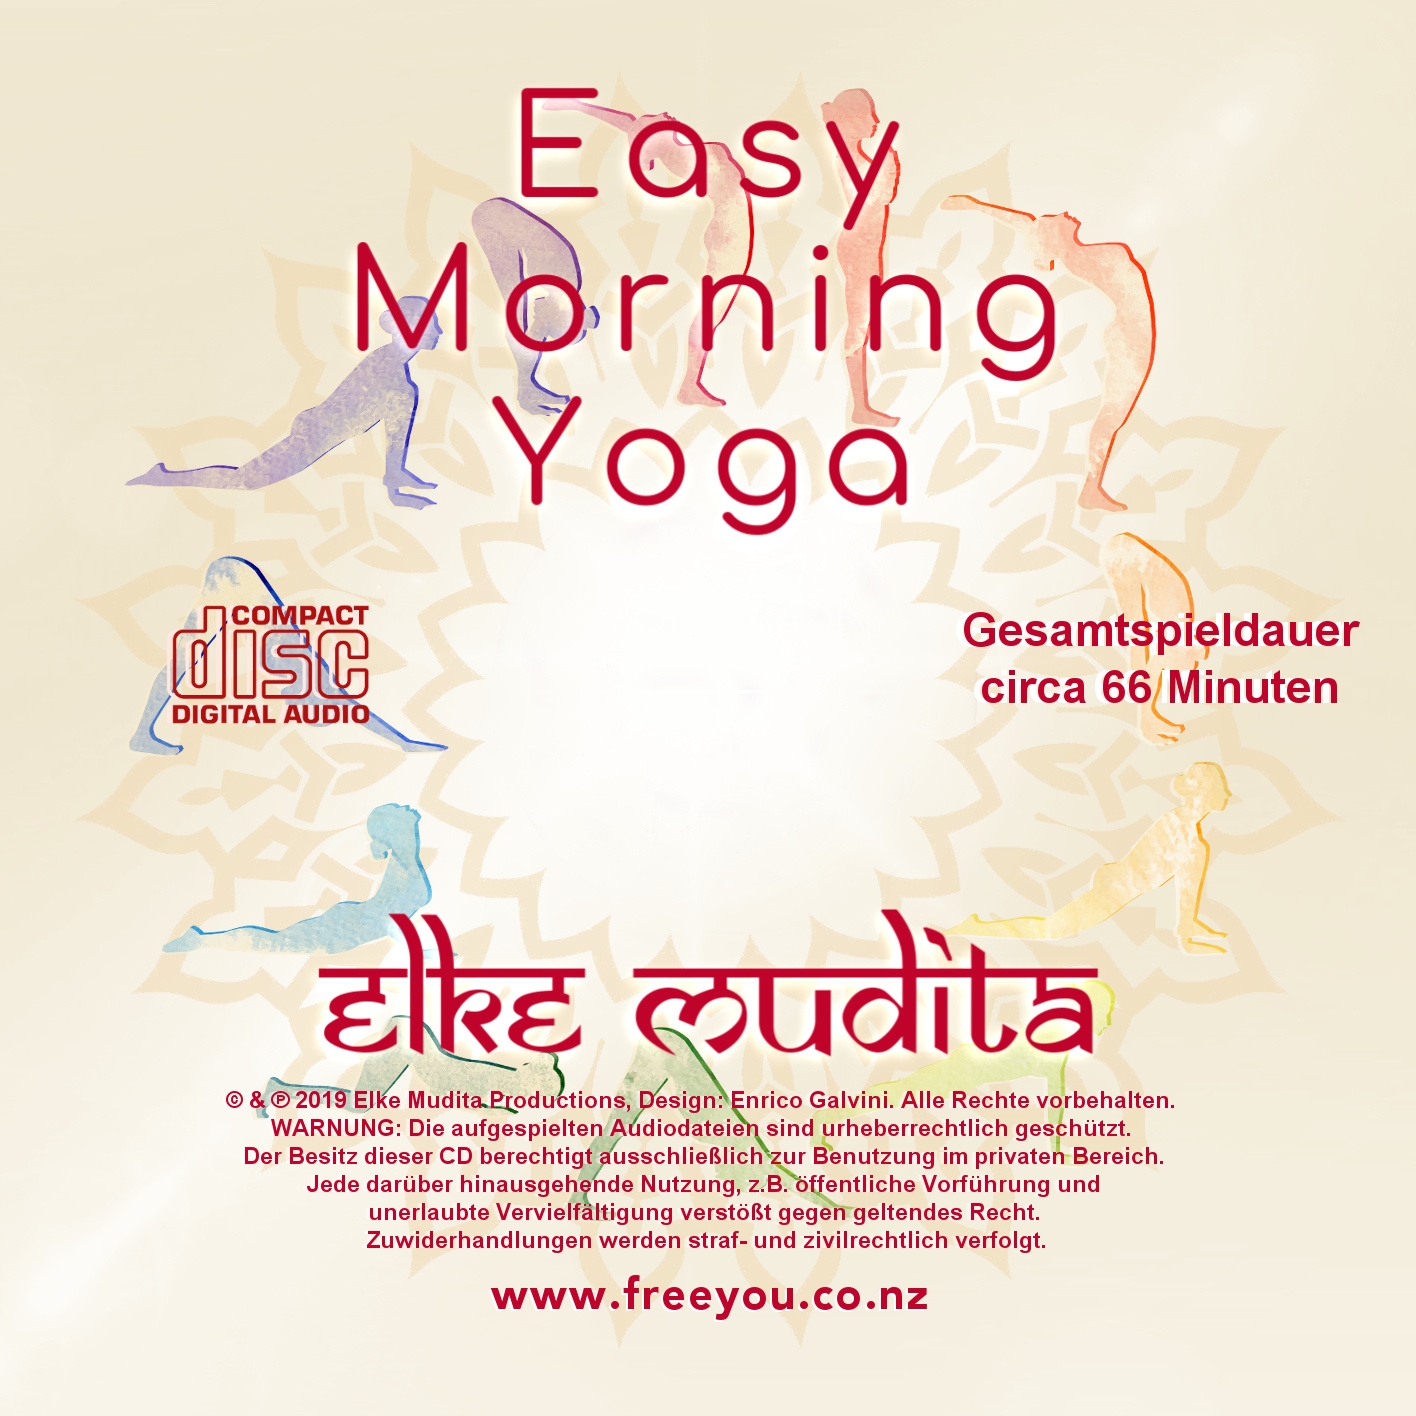
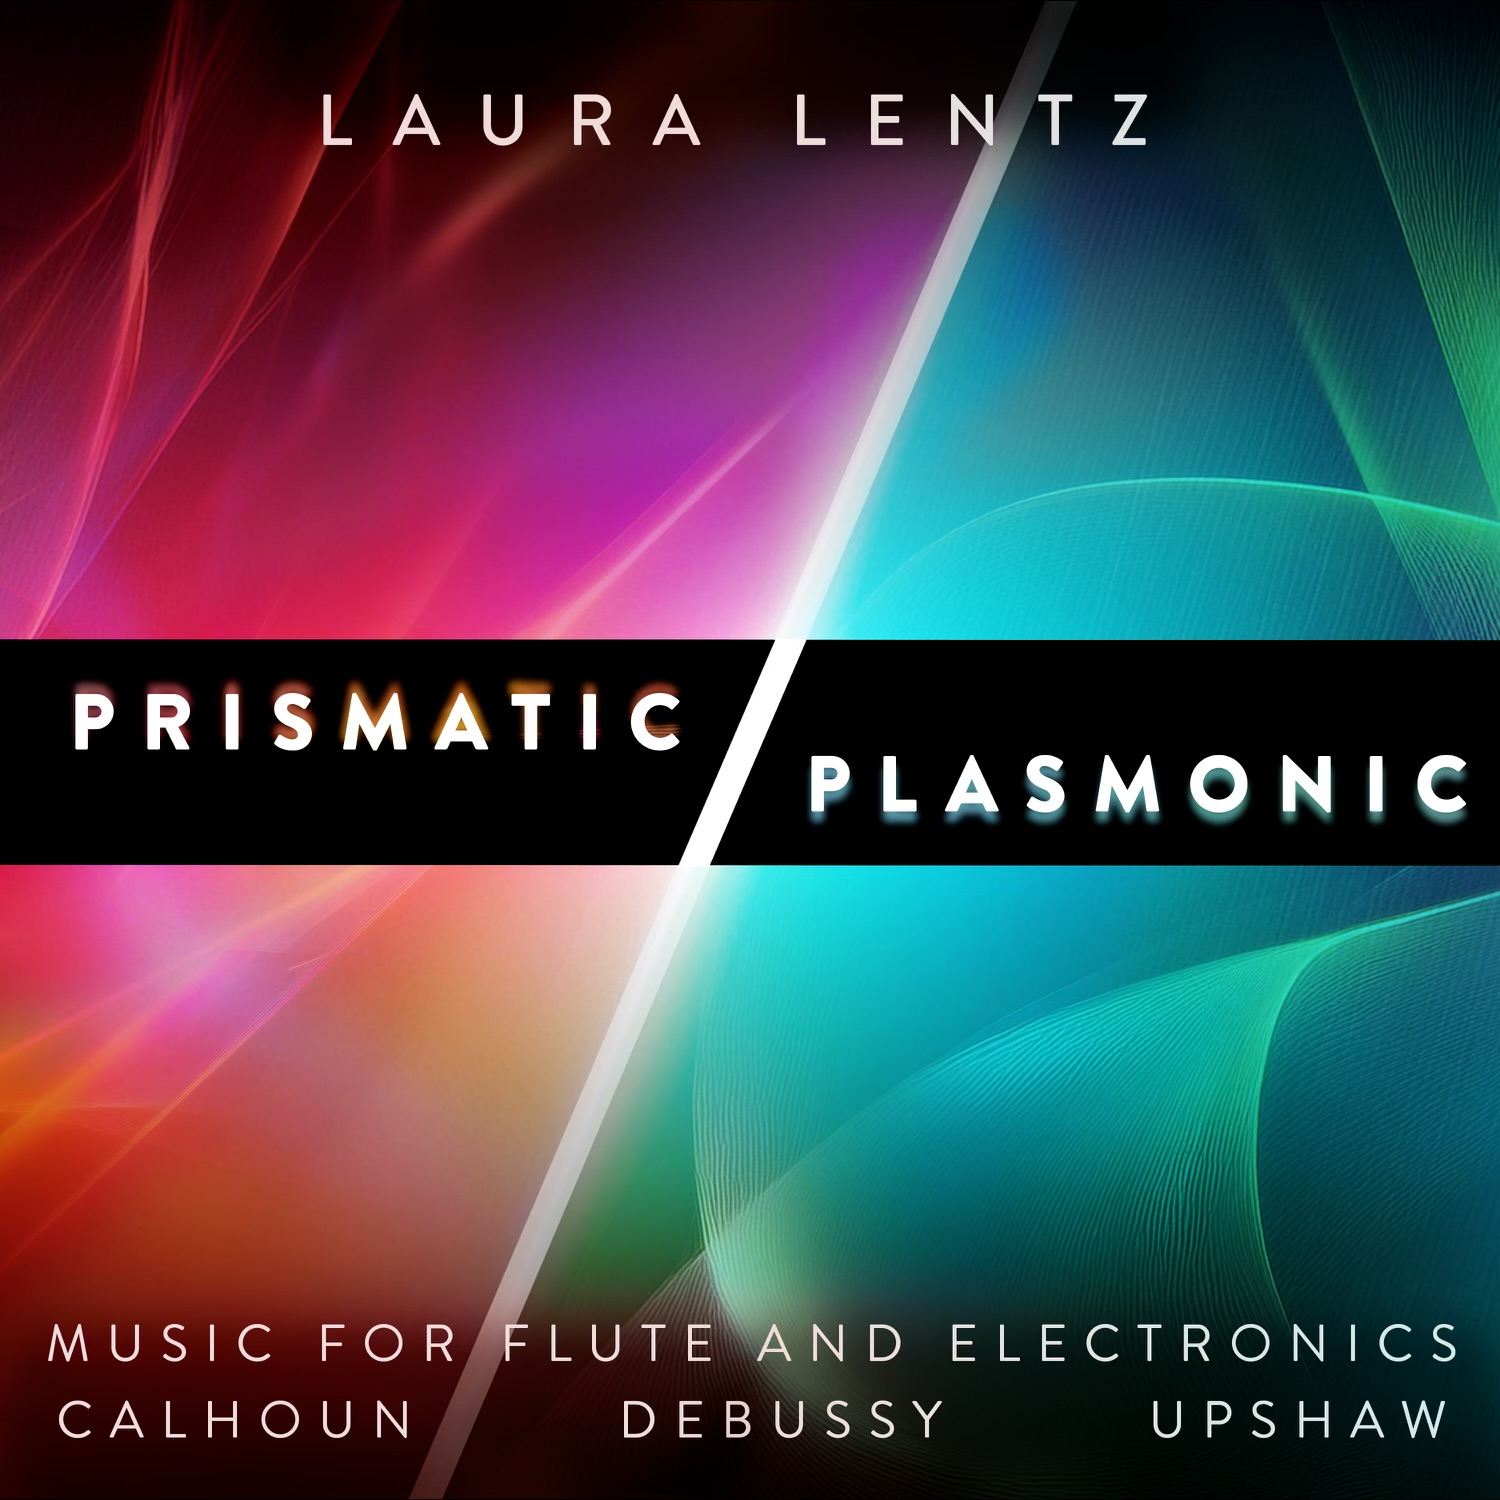
Some examples:
- Your disc artwork should be square and extend from corner to corner and to the center.
- Keep important text or artwork far enough away from the circular edge and center hub.
- Do not include circular cut marks, edges, borders, or hub marks.

Good #1

When Printed
Good #2
When Printed
Bad #1 Text near corners
Text Cut Off!
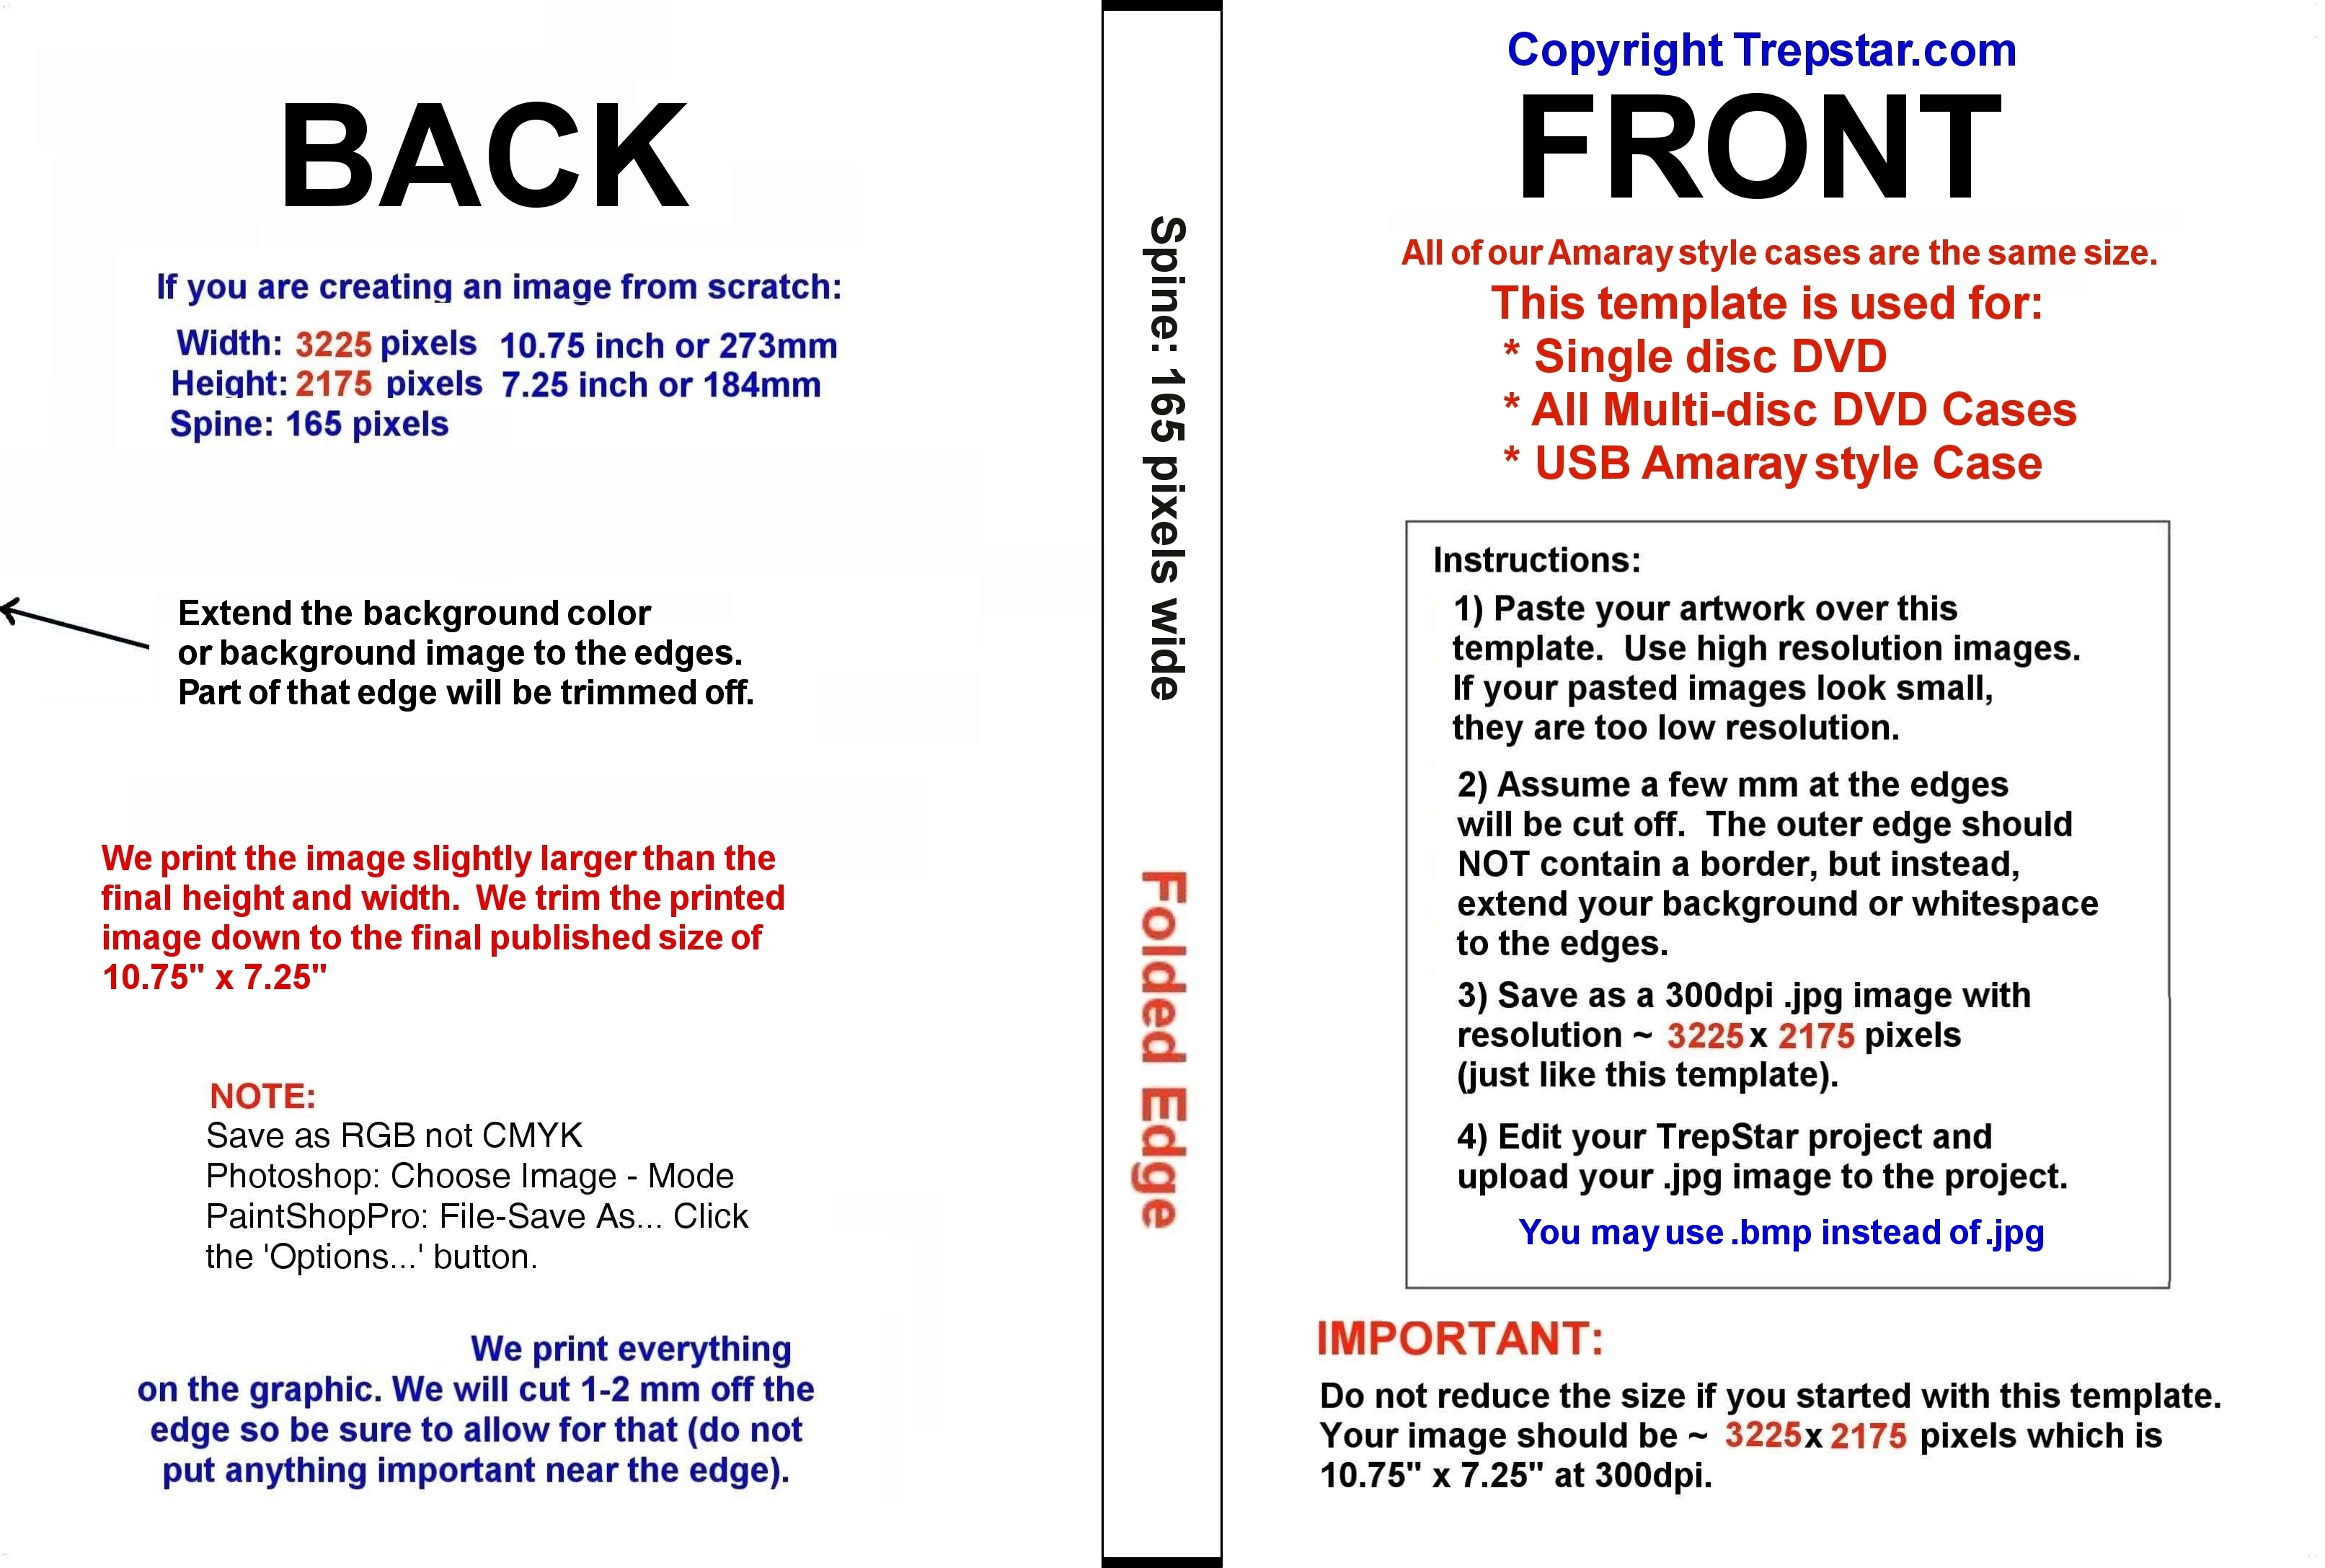
DVD or USB Case overwrap. We use the same overwrap for our USB Amaray, Single Disc and Multi-Disc DVD cases since they are all the same size.
The Amaray style overwrap (coversheet / entrapment) is printed artwork that is inserted in the plastic sleeve (entrapment) located on the outside of the case. This is
what you see when you're looking at the closed (amaray style) case.
- CD/DVD artwork examples. | USB artwork examples.
- Here is a link to a Amaray case cover overwrap template. View
- We use the same size case for USB, single disc, or multi disc cases which means the artwork is the same for ALL of our amaray style cases regardless if you have a USB, standard single disc product, or a multi disc set.
- Download this file by right clicking on it and choosing save as... Then using Paint, Paint Shop Pro, PhotoShop, or any other graphics editor, add your artwork to this template.
- Save as RGB not CMYK
- No matter what size or shape image you upload, our system will stretch the image to fit. It's always best to start with a template so the dimensions (aspect ratio) of your artwork will be the same or similar to what's printed.
- We print the artwork slightly larger than the templates published dimensions. It is trimmed slightly to the final size.
- If you need help, we suggest you try Canva.com to create free artwork. Watch Video: Create Free artwork on Canva:
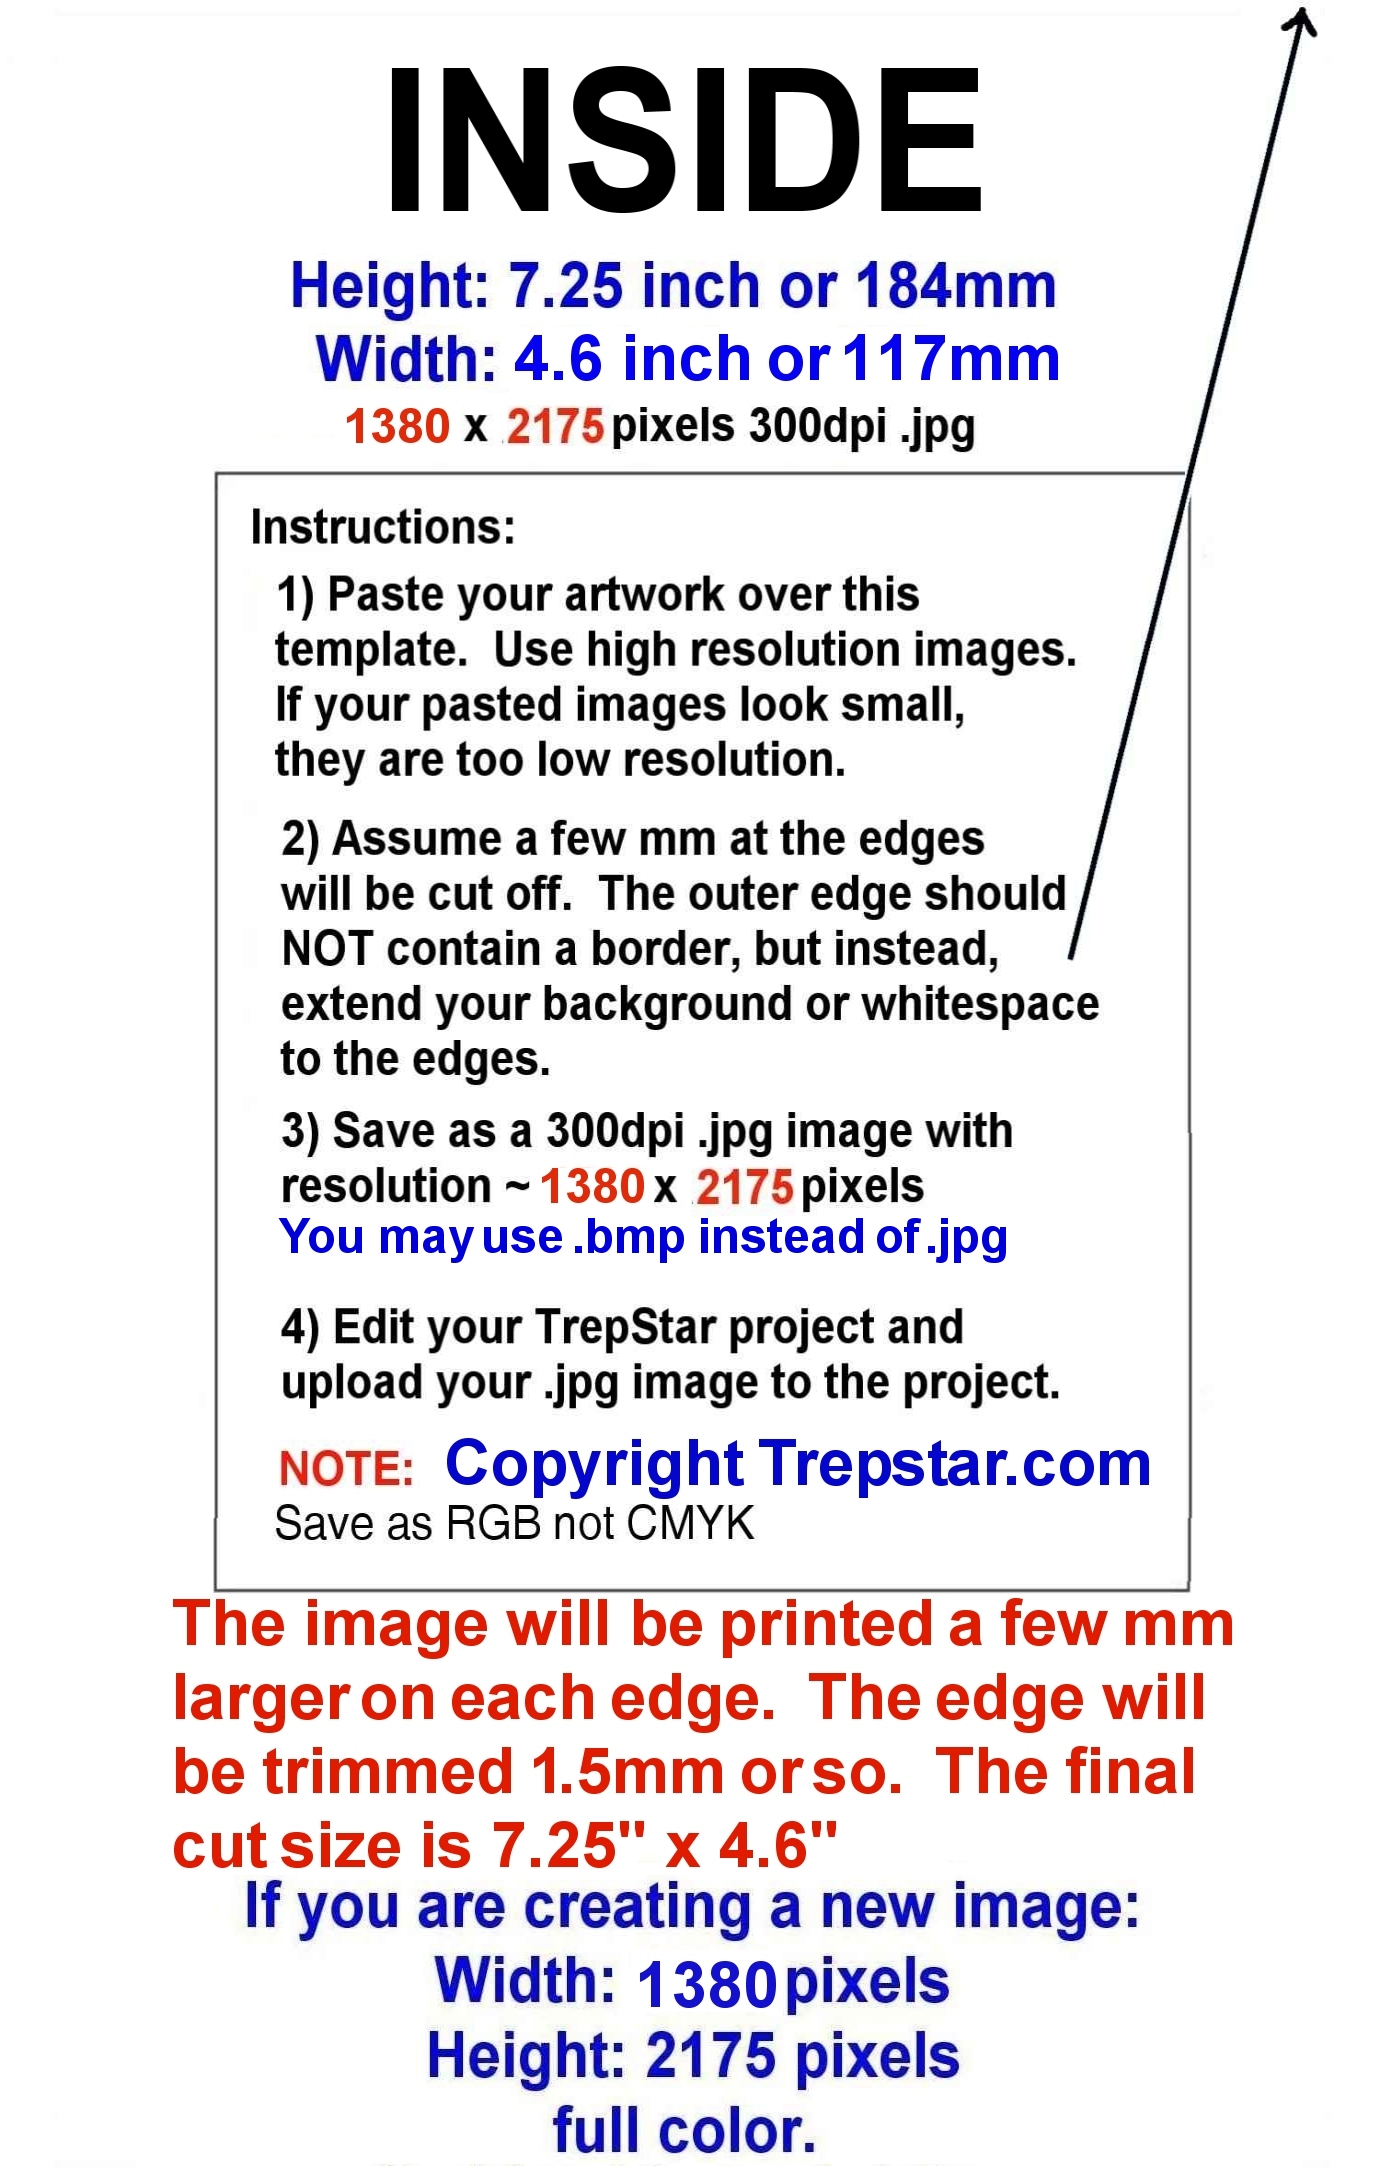
DVD or USB Inside Amaray Case Panel Insert
The one sided panel insert is held in place by clips on the inside of the amaray style case.
When you open the case, it is inserted on the left hand side. The disc or USB flash drive is placed on the right hand side. The dimensions are listed below.
- CD/DVD artwork examples. | USB artwork examples.
- Here is a link to the inside panel insert. View
- We offer just this basic one panel size (not double sided, or multi page). It's printed on a single side only.
- We print the artwork slightly larger than the templates published dimensions. It is trimmed slightly to the final size.
- No matter what size or shape image you upload, our system will stretch the image to fit. It's always best to start with a template so the dimensions (aspect ratio) of your artwork will be the same or similar to what's printed.
- Download this file by right clicking on it and choosing save as... Then using Paint, Paint Shop Pro, PhotoShop, or any other graphics editor, add your artwork to this template.
- Save as RGB not CMYK
- If you need help, we suggest you try Canva.com to create free artwork. Watch Video: Create Free artwork on Canva:
CD Case (Cover & Insert) or EcoPack (Front & Back) 2 Panel Artwork
This same 2 panel artwork is used for several types of packaging. For CDs the Cover and Insert are combined. For EcoPack, the Cover and Back are combined.
The 2 panel image is really two square images side by side combined.
It's inserted in either a CD style case or our EcoPack. The EcoPack is made by folding the 2 Panel artwork and placing it in a clear resealable sleeve.
- For CD Case style packaging: One panel (the cover) of the folded 2 panel artwork can be seen from the front of the CD case when it's closed, and the other (the insert) can be seen from the inside of the CD case when it is open.
- For EcoPack: The folded 2 panel artwork is placed in a clear resealable sleeve. One panel is the front cover and the other is the back and the disc or USB is placed inside the folded artwork.
If you already have two separate images for the front cover and the inside insert, create the 2 panel image this way:
First, create a larger image that is twice as wide as your current cover or insert artwork image.
Then copy and paste your cover and insert artwork into the new image side by side.
The dimensions are listed below.
For USB Flash Drive packaging choices that include a 2 Panel image, this same template is used.
- CD/DVD artwork examples. | USB artwork examples.
- A CD, DVD can be placed in our CD Case style package. Sometimes this is called a jewel case. In addition, our EcoPack uses the same 2 panel template since it's the same size. This template is used for all of those types of packaging (Discs in CD Case, Discs or USBs in EcoPack).
- Here is a link to the 2 panel template. View
- Download this file by right clicking on it and choosing save as... Then using Paint, Paint Shop Pro, PhotoShop, or any other graphics editor, add your artwork to this template.
- Save as RGB not CMYK.
- We print the artwork slightly larger than the templates published dimensions. It is trimmed slightly to the final size.
- No matter what size or shape image you upload, our system will stretch the image to fit. It's always best to start with a template so the dimensions (aspect ratio) of your artwork will be the same or similar to what's printed.
- If you need help, we suggest you try Canva.com to create free artwork. Watch Video: Create Free artwork on Canva:

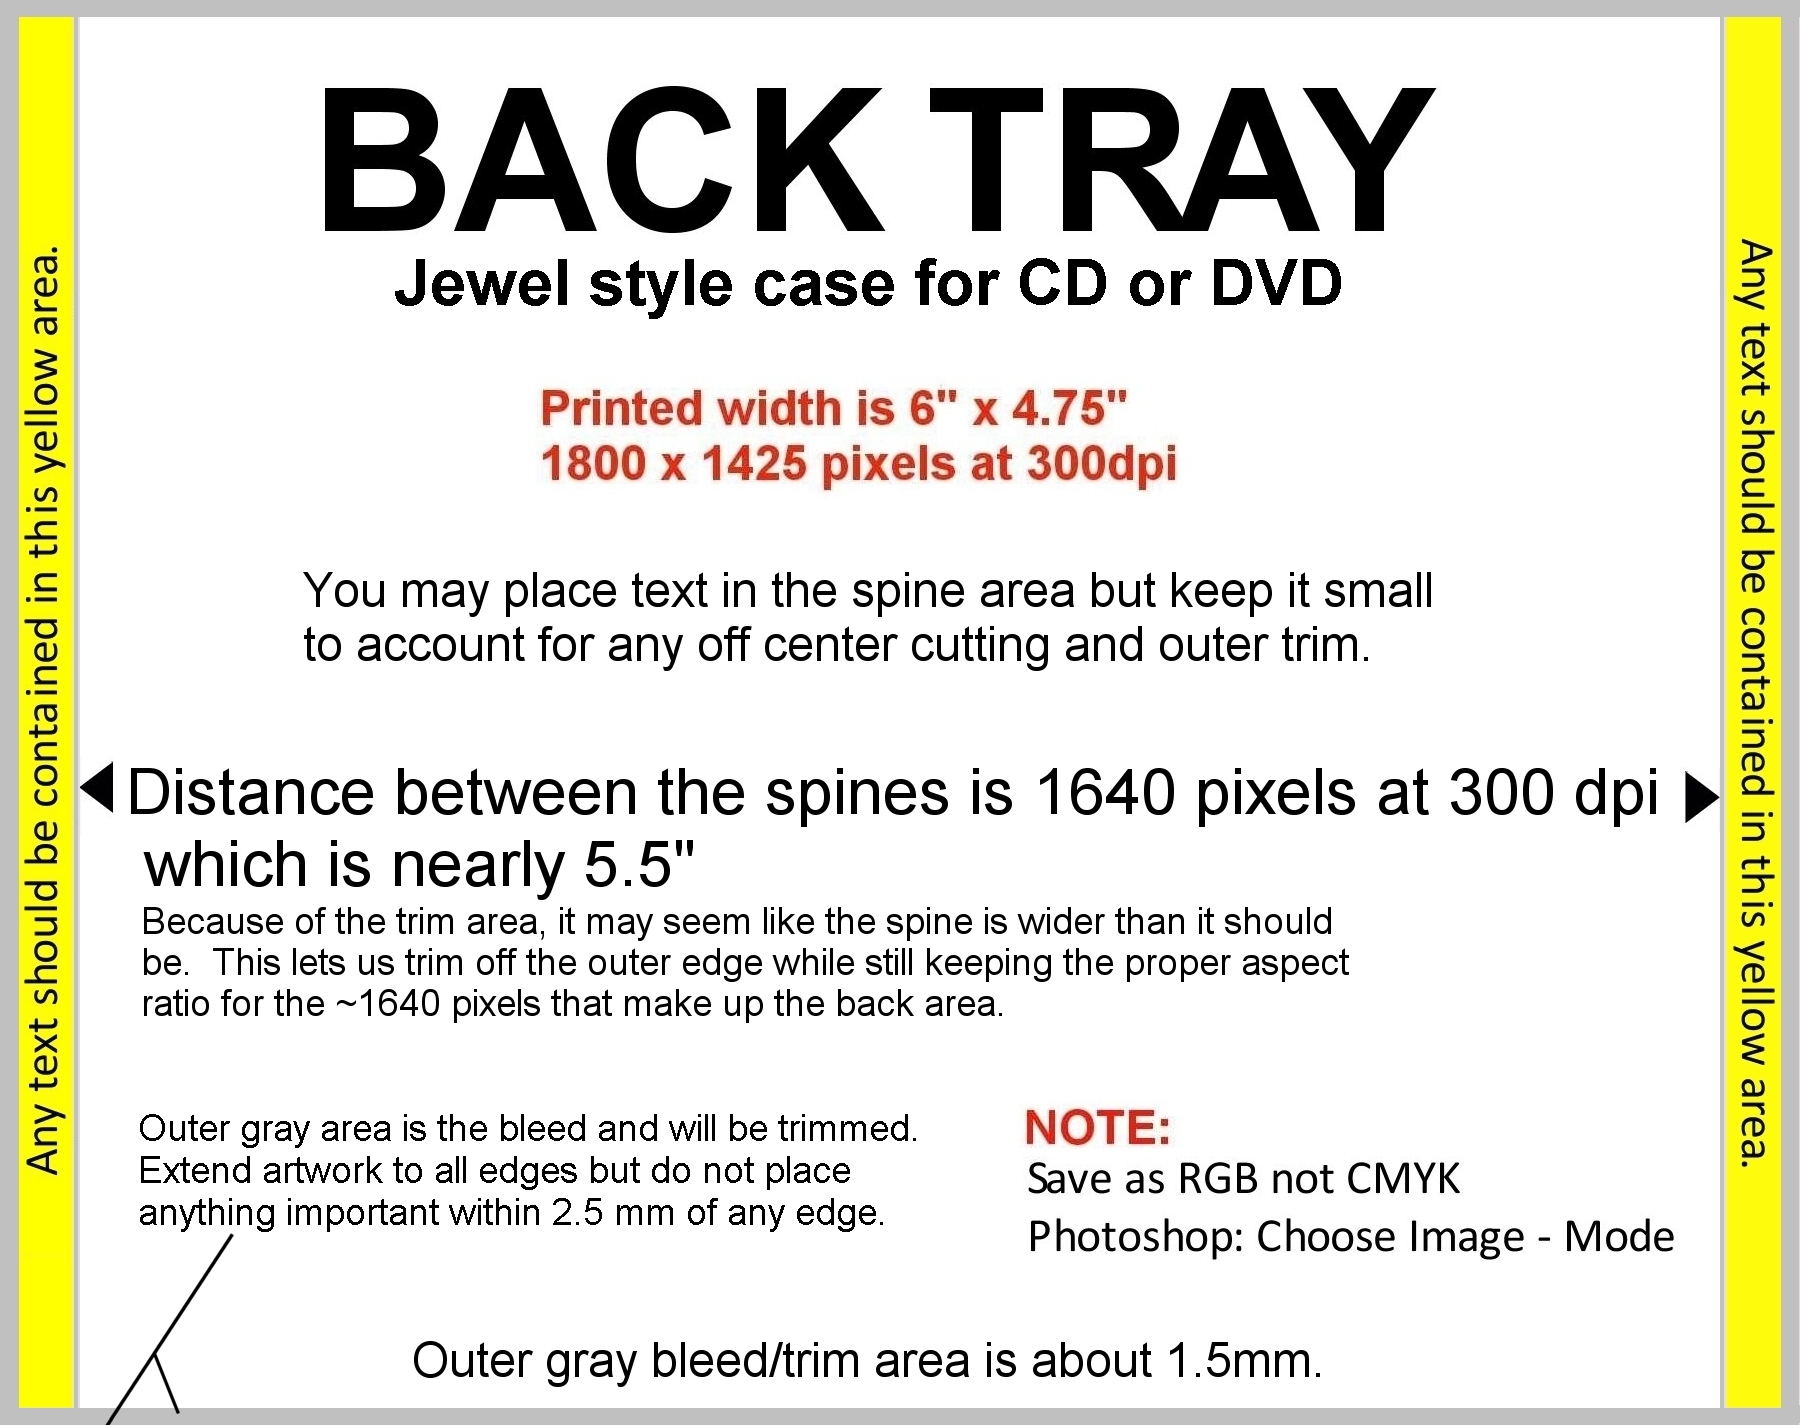
CD Case (jewel case) Back Tray Card Insert
This is placed inside the clear CD case and is visible from the back and side edges of the CD case. We use black trays, not clear trays,
so printing is one sided only (4/0). The dimensions are listed below.
- Here is a link to the back tray card insert template. View
- Download this file by right clicking on it and choosing save as... Then using Paint, Paint Shop Pro, PhotoShop, or any other graphics editor, add your artwork to this template.
- Save as RGB not CMYK
- We print the artwork slightly larger than the templates published dimensions. It is trimmed slightly to the final size.
- Use small text on the spines because 1mm is trimmed on each size (each spine). It's very hard to get this perfectly trimmed and centered so use as small and as little text as possible and keep away from the edge.
- No matter what size or shape image you upload, our system will stretch the image to fit. It's always best to start with a template so the dimensions (aspect ratio) of your artwork will be the same or similar to what's printed.
- If you need help, we suggest you try Canva.com to create free artwork. Watch Video: Create Free artwork on Canva:
Save your images with an RGB color profile, not CMYK:
- NOTE: Save your .jpg as RGB not CMYK. Our system is designed to take RGB jpg images not CMYK.

In Paint Shop Pro choose File - Save As... Then click the 'Options...' button to confirm you're saving as RGB.

When saving as .JPG, use highest "quality" setting when saving the file:
- NOTE: When saving to the .jpg file type, there will by some type of options.
It will be a button or setting that enables you to set the compression factor which affects the quality of the final saved image.
- .jpg is a "lossy" compression which means some of your original high resolution source image is lost when the .jpg compression algorithm converts the file when it is saved. This is virtually invisible to the eye (with the smallest compression factor) unless you're really looking closely at the image under magnification. This is true only if you use the least compression. If you use a high compression factor, the image file size is smaller but it will start to look pixelated (some artifacts are introduced into the image).
- It is very important to use the least compression which is the
best quality.
- This will mean a larger file size, but the printed output will be best.
- If you are modifying your image multiple times between saving, always go back to the original high resolution source image to start with (.bmp, .png, .tiff etc.). Make your changes to that original file, then save a .jpg copy at highest quality, lowest compression.
- If you're really concerned with resolution, compression, and artifacts that are not noticeable by most people, you may also use .bmp images. .BMP images have a larger file size but are not compressed, nor "lossy" and will preserve the highest resolution.

Artwork Services and Software:
- FREE: Try Canva.com to create free artwork online. Watch Video: Create Free artwork on Canva:
- PhotoShop: See more about Photoshop.
- Always save .jpg as RGB not CMYK