|
Connect your Shopping Cart to Zapier Integration: |
Overview:
- If TrepStar does not have a direct integration with your shopping cart, and you use Zapier or plan to sign up for Zapier.com, use this integration example to connect your shopping cart to Zapier.
- When new orders are submitted to your shopping cart, Zapier will "Zap" that order data to the TrepStar order server so they automatically get submitted to TrepStar for order fulfillment.
- When in Zapier, you can search to see if your shopping cart is supported. If it is, you can connect your shopping cart 'New orders' event to the Zapier 'WebHooks' step. This means when new orders from your cart arrive, that order data is automatically submitted to the TrepStar order server which automates the order submission process.
 Watch the Zapier Integration Video: 13 Minutes.
Amazon Seller Central Users:
- If you sell TrepStar CD/DVD/USB products on Amazon, and are not using fulfillment by Amazon for your
TrepStar products, you can automate TrepStar ordering when you receive orders from Amazon.
Click Here to learn more about how to integration Amazon Seller Central with TrepStar.
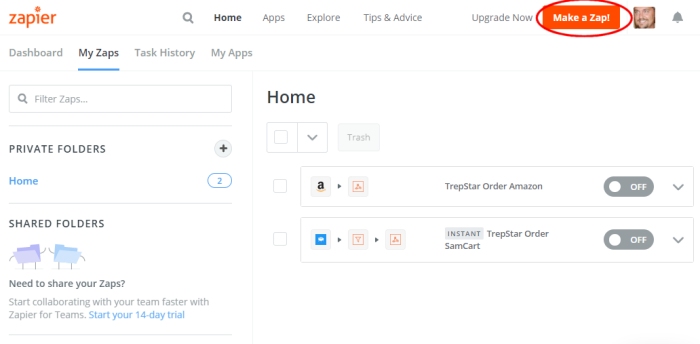
Connect your shopping cart with Zapier.
- Click 'Make a Zap!'
- Search for your cart.
- This example shows SamCart but your shopping cart will be set up similarly if it's supported by Zapier (see below).
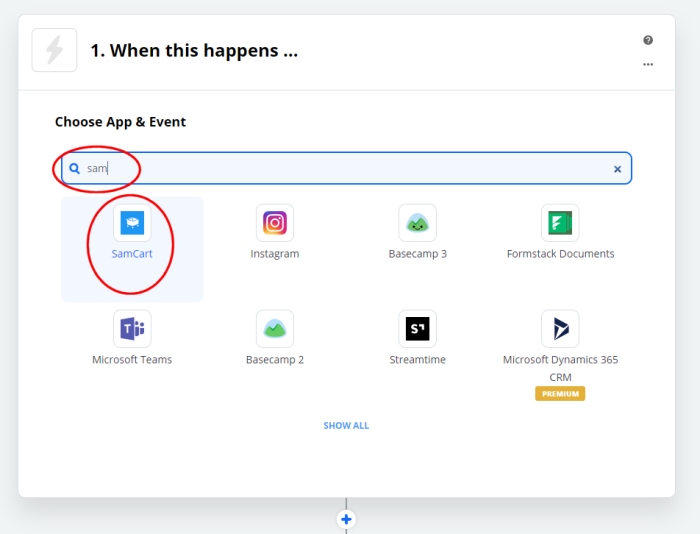
Search Zapier to see if your cart is supported.
- Within the 'Choose App & Event' section, start to type in the name of your shopping cart.
- If you see your cart, select it and continue.
- If you do not see your cart, it is not supported at this time. Ask Zapier to support it.
- At the time of this writing, several shopping cart systems are supported by Zapier such as:
- Amazon Seller Central
- BigCommerce
- ClickFunnels
- 3dCart
- Magento
- Volusion
- EcWid
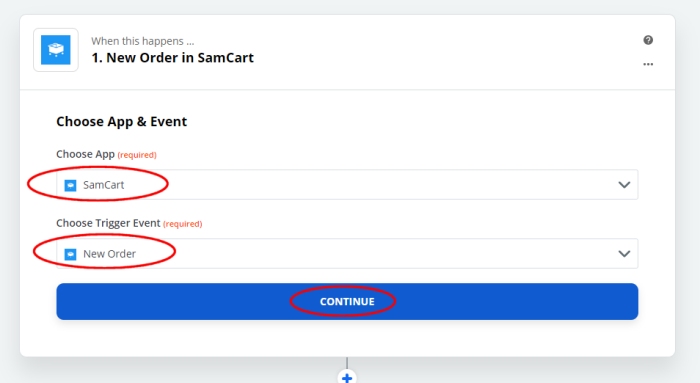
Choose a trigger event.
- When you've found your cart, Choose the Trigger Event.
- The trigger event should be something similar to 'New Order'
- Click Continue.
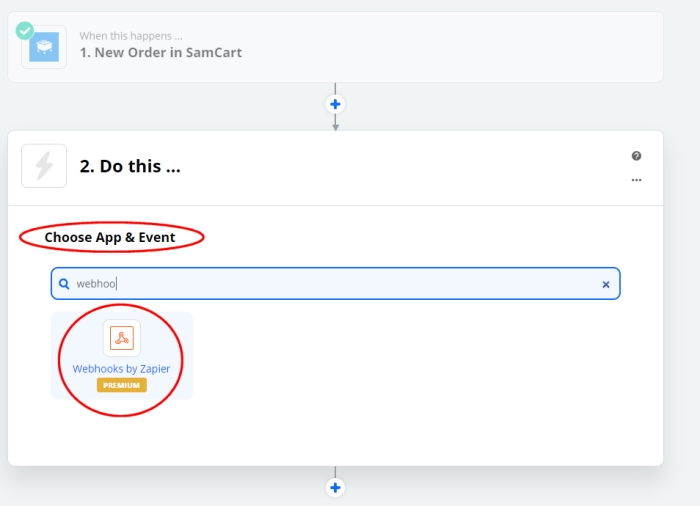
Choose Webhooks by Zapier for the action.
- For the "Do This ..." step, start to type in 'webhooks'
- You should see the 'Webhooks by Zapier' function.
- Choose it and continue.
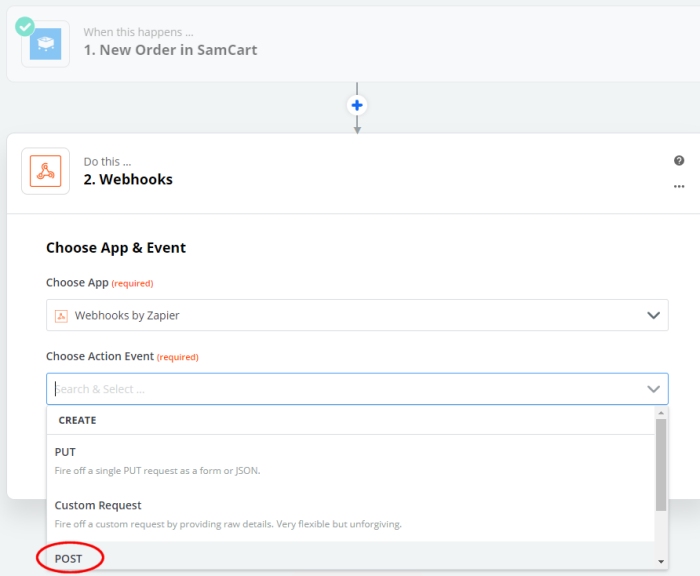
Choose POST
- Choose POST from the list
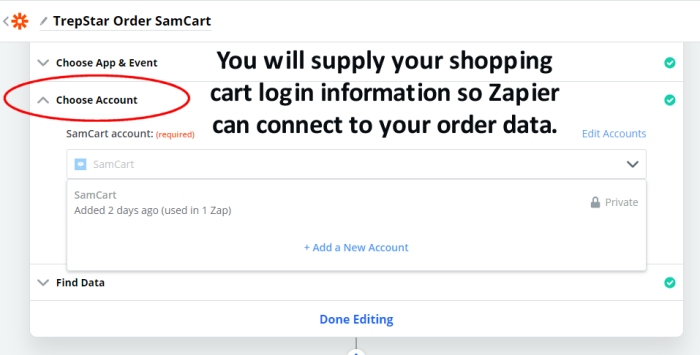
Choose Account
- Zapier saves logins to your accounts.
- If you have not done so earlier, you will be asked to login to your shopping cart.
- Once that is done, you can continue to the 'Find Data' step.
- In the example to the right, we picked SamCart from the list because we had already set this up earlier.
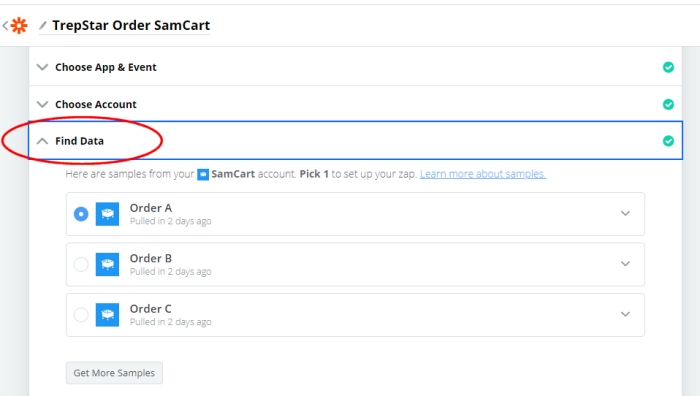
Find Data
- In this Find Data step, Zapier will attempt to gather order data from your shopping cart.
- If you don't have any orders yet, Zapier may supply some test data.
- Choose one of your orders. If you can, choose an order that had multiple products in the order.
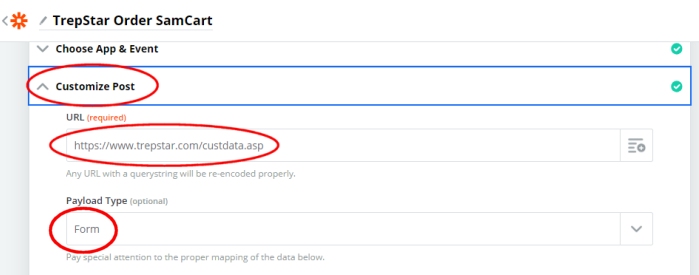
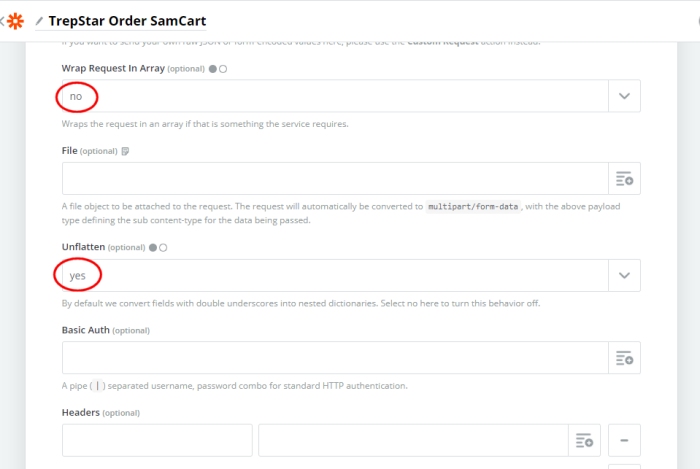
Customize Post
Click to customize the Post data.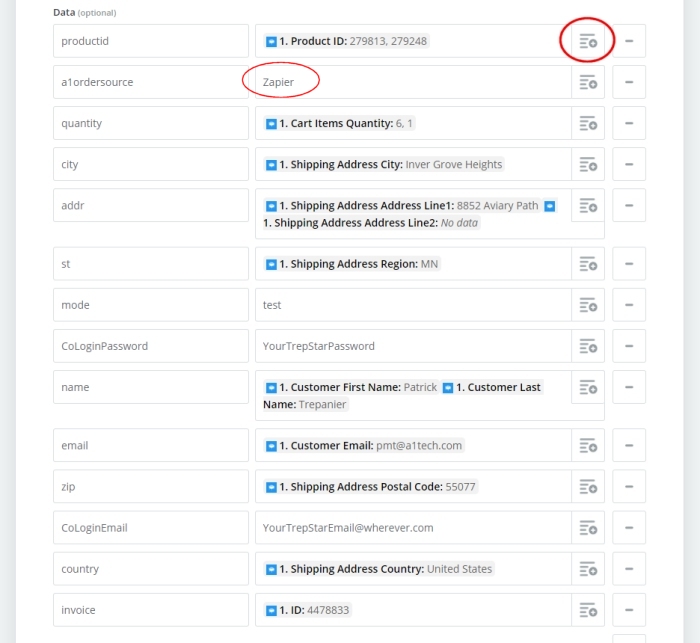
Data and URL
- URL needs to be set to:
- Payload must be set to Form
- Data
- The idea is to type in the TrepStar field name on the left, and find the associated data element from your example order data.
- You will type in specific field names on the left hand column.
- These field names must be spelled correctly. Copy and paste them from below.
- It does not matter if they are upper or lower case.
- The field names from SamCart are things like ProductID, Customer Email etc.
- The order of the field names does not matter.
Data Fields:
The following list are the fields required by TrepStar that you need to configure:| productid | Each shopping cart has a field containing the unique SKU or product ID (or list of IDs). |
| quantity | Quantity for each product ordered. |
| invoice | This should be set to something like the order ID. This should be a unique value within the order data. This is usually in a field named ID or Invoice for example. |
| name | Customer name (combine first and last names if necessary) |
| addr | Shipping street address (combine both lines 1 and 2) |
| city | Shipping city |
| st | Shipping state |
| zip | Shipping zip or postal code |
| country | Shipping country or country code |
| Customer Email | |
| CoLoginEmail | Your TrepStar Login Email. |
| CoLoginPassword | Your TrepStar password |
| mode | test or prod. Set to test at first, and change to prod when you see test orders correctly submitted to TrepStar |
| a1ordersource | Must set to Zapier. There is an error in our video (link above) that says you can put anything in this field. That is wrong. It must be Zapier only. |
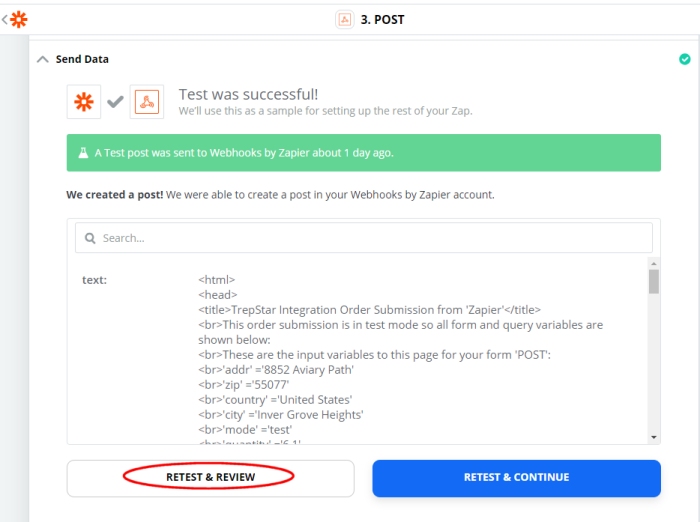
Testing.
- When finished setting up the POST variables above, login to TrepStar and configure your products (see the next step below).
- When you've set the TrepStar eCommerce ID String for each of your shopping cart Product IDs/SKUs, you can then 'Test & Review'.
- Look for the responses from the TrepStar server.
- Check your TrepStar account 'Recent Orders' list.
- You must associate your TrepStar products with your shopping cart product IDs/SKUs before this will work (see the next step below).
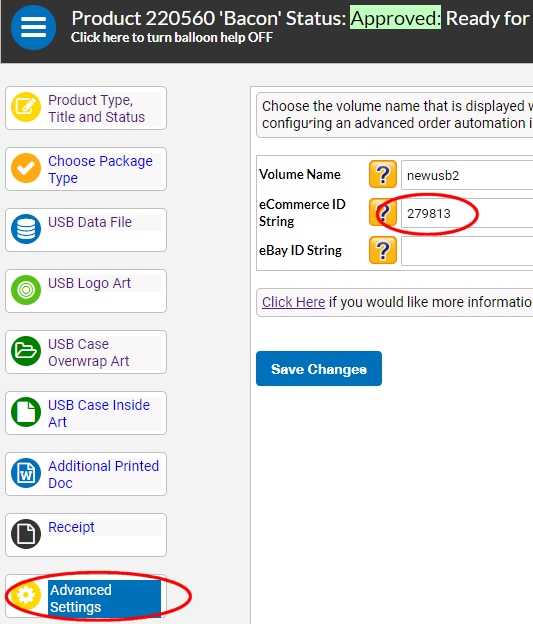
Correlating your Shopping cart products with your TrepStar Products.
- In an earlier step (above), you assigned the TrepStar productid field to your cart Product ID(s).
- In the example above, the order was for product IDs 279813 and 279248.
- For example, if the product 279813 corresponded to a TrepStar product, you would need to:
- Login to TrepStar
- Configure that corresponding TrepStar product.
- Go to the 'Advanced Settings' section of the TrepStar project.
- Copy/Paste your shopping cart product ID into the TrepStar eCommerce ID String and Save the changes.
- By doing this, you've associated the shopping cart product ID with the TrepStar ID.
- This is the only way TrepStar knows which project was ordered.